The Keurig 2.0 coffee maker is a single-cup coffee maker that offers a convenient way to make coffee quickly and easily. Here is a comprehensive guide on using your Keurig 2.0 coffee maker to make your perfect cup of coffee.
Keurig 2.0 is a type of coffee maker produced by Keurig. It is a popular brand in the single-serve coffee industry. The Keurig 2.0 is an updated version of the original Keurig machine. It offers different new features and improvements over its predecessor.
Some of the key features of the Keurig 2.0 include a more extensive water reservoir and compatibility with a wider range of K-Cup pod sizes. The machine also has a color touchscreen display and adjustable brew temperature. It also can select the strength of your brew.
How To Use A Keurig 2.0 Coffee Maker
Overall, the Keurig 2.0 coffee maker is a convenient and easy-to-use machine. It offers different brewing options for coffee lovers. However, some people have criticized the machine for being proprietary. It means it can only be used with Keurig’s brand of K-Cups and not with other third-party coffee pods. Now let’s have a look at how to use a Keurig 2.0 coffee maker.
Setting Up A Keurig And Cleaning It

You must set up the machine and flush the internal components with water before using it for the first time.
1. Unboxing And Plugging In Your Machine
The first step is to remove the Keurig 2.0 from the box. Unbox it after removing all the tape. Then plug the machine in the socket.
You can also take help from the user manual, and in that manual, there is a lot of information about how to use a Keurig brewer. In this post, we are giving all the details about the use of the specific machine.
2. Lifting The Handle And Discarding The Shipping Disc
If the packaging includes the shipping disc, you must lift and discard the handle. On the other hand, this step is not for the device that does not come with the disc.
The need to tell these things is necessary because sometimes, you have to move somewhere, or sometimes, you have to sell it to someone else.
3. Removing The Water Reservoir And Cleaning
This step involves removing and cleaning the water reservoir with warm water and soap. Keep in mind that this step is not for machines with unremovable water reservoirs, such as K10 and K15.
Our main purpose is to rinse the water reservoir before the first usage. Use a soft sponge or warm water to clean it. Do not use those cleaning devices which cause scratches on the machine.

4. Make Sure The Charcoal Water Filter Is Activated
There is no need to do this step if your coffee maker does not come with a charcoal filter. According to experts, these filters should not be placed in water filter holders immediately after being opened. Just follow the easiest simple steps to prime the charcoal water filter.
Let it soak up all the water by washing it with cold water first. In a bowl of water, soak this filter for about five minutes.
5. Putting The Charcoal Water Filter In The Handle
Here, we will put the filter into the reservoir at this step. There are two parts to this water filter holder.
- Top handle that joins onto the bottom
- Bottom pod holder
The charcoal water filter should be placed on the bottom of the top handle. Attach the filter to the reservoir of water. We will fuse everything here.
6. Fill The Reservoir
Fill the water reservoir to the specified line in this step. You can fill this reservoir with tap water if there is a charcoal water filter.
7. Turning On
The preheating process must be completed by pressing the power button. Preheating usually takes 20 seconds to 3 minutes on most machines.
8. Put A Mug On The Drip Tray
Place a mug on the drip tray in this step. Some machines have a sensor that prevents them from brewing without a mug on the drip tray.
9. Lifting And Lowering The Handle
The handle needs to be lifted and lowered without the pod inserted. If you use a coffee pod, be sure not to waste it since it is cleansing.
10. Selecting The Maximum Size Brew Settings
Here, we must choose the maximum size brewing settings and then press brew.
It takes just 30 seconds to 3 minutes to complete the brewing process. Your Keurig brewer can now be used daily once these components are properly rinsed.
Brewing And Daily Use Of The Keurig Machine
You can use your coffee maker regularly when the initial setup is completed.
1. Grab A Mug And Choose Your Pod
Remember that you can use thousands of k-cups for your Keurig machine. But some are not compatible with the model.
2. Lifting The Handle And Inserting The Pod
In this step, we have to lift the handle and insert the pod but make sure that you have lowered the handle. A Keurig 2.0 device pierces the top and bottom of the pod when we insert the pod. This is the secret of the Keurig brewing system.
Now, it’s your wish which type of coffee pot you want to use in the machine. You can use a Keurig coffee pod or Keurig My K-cup reusable pod. Instead of using K Cups, you can brew coffee using the reusable pod. The standard pod assembly must be removed to use the K-cup pod. It can easily be joined, which is very easy to do.
3. Selecting The Required Settings For Your Brew
It always depends on the model you are using, and it includes one or multiple settings. These settings are:
- Beverage selector or hot cocoa
- Brew temperature
- Brew size
4. Press Brew And Wait
Depending on the model, brew buttons take many forms.
- Button for touch display
- There is a physical button.
Sometimes, the buttons are not present; the brewing starts when the handle is lowered.
5. Enjoying Your Coffee
Your coffee will be ready again in 30 to 60 seconds in Keurig 2.0. However, if you talk about other machines, they might take a few minutes to get up to the property temperature.
How To Access Keurig 2.0 Brew Settings
To access the brew settings on your Keurig 2.0 machine, you need to follow these steps:
- Turn on your Keurig 2.0 machine.
- Locate the “Settings” button on the control panel and press it.
- Use the Brew Size and Strength Control buttons to select your desired brew size and strength.
- Press the Settings button again to exit the menu and begin brewing.
Note
The exact location and appearance of the buttons may vary depending on the model of your Keurig 2.0 machine. Some Keurig 2.0 models may also have settings like temperature control or auto-off that can be accessed and adjusted similarly.
What Is The Purpose Of Cleaning A Keurig?

Cleaning a Keurig is important for different reasons.
1. Improving taste
Over time, coffee oils and residue can build up in the machine and affect the taste of your coffee. Regular cleaning can help improve the taste of your coffee.
2. Maintaining Performance
A dirty Keurig can cause the machine to clog, leading to reduced performance and efficiency. Regular cleaning helps keep the machine running smoothly and ensures you can enjoy your coffee without any issues.
3. Preventing Mold Growth
If you don’t clean your Keurig regularly, mold can grow in the machine, which is unsanitary and can also affect the taste of your coffee.
4. Lengthening The Lifespan
You can extend the lifespan of your Keurig machine by regularly cleaning and maintaining it. It ensures that it continues to perform well for many years to come.
So, it is important to clean your Keurig regularly to maintain its performance, improve the taste of your coffee, prevent mold growth, and extend the machine’s lifespan.
How To Clean A Keurig 2.0 Coffee Maker
To ensure that your Keurig 2.0 coffee maker continues to make delicious coffee and to extend its life, you should clean it regularly. Cleaning your Keurig 2.0 can be done in the following ways:
1. Unplug The Machine
Make sure to unplug the coffee maker before starting the cleaning process.
2. Empty The Water Reservoir
The water reservoir should be drained of any remaining water.
3. Exteriors Should Be Cleaned
Using a damp cloth, wipe the machine’s exterior.
4. Machine Descale
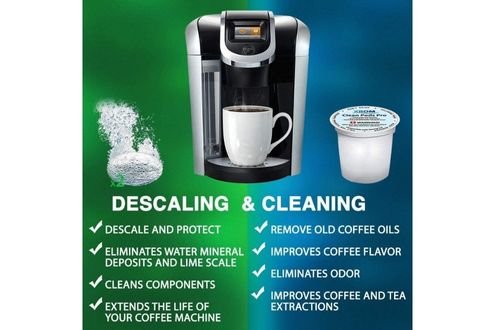
In coffee makers, descaling removes mineral buildup. A descaling solution or mixing white vinegar and water is best for descaling. Make a cup of coffee by filling the water reservoir with the solution and running it through the machine. Repeat the process until the solution has completely run through.
5. Clean The Needle
The needle punctures the K-Cup and allows water to flow through. Use a paperclip or a clean toothbrush to remove any built-up coffee grounds or debris from the needle.
6. The Water Reservoir Needs To Be Cleaned
Fill the water reservoir with warm water and mild dish soap. Run it through the coffee maker as if you were making a cup. Then empty the reservoir and rinse it several times with clean water.
7. Reassemble The Machine
Reassemble the machine and plug it back in.
8. Run A Cleaning Cycle
Finally, run a cleaning cycle with water to ensure that any remaining solution or debris has been flushed out. Following these steps, you can keep your Keurig 2.0 coffee maker running smoothly and making delicious coffee.
Frequently Asked Questions
How Do I Operate The Keurig?
To operate a Keurig, fill the water tank with fresh water, then turn the machine on. Place a cup on the cup platform and select your desired K-Cup. The machine will heat up and puncture the K-Cup, brewing your selected beverage into your cup. Enjoy your freshly brewed coffee, tea, or other hot beverage.
Is Keurig Good For Tea?
Tea can also be made with Keurig machines, although coffee is their primary use. However, it depends on the type of tea you want and how you want to make it. Some Keurig machines have K-Cups containing tea, which can conveniently make a single cup of tea. However, the quality of tea from these K-Cups can vary, and some people find that it does not taste as good as a freshly brewed tea.
Can We Use Milk Instead Of Water In My Keurig?
Using milk instead of water in a Keurig machine is not recommended, as it can clog the brewing mechanism and cause damage to the machine. Keurig machines are designed to brew with water; using any other liquid can cause problems. It’s best to stick to water when using a Keurig to ensure the proper functioning and longevity of the machine.
Final Thoughts
Overall, the Keurig 2.0 coffee maker is a convenient and easy-to-use machine with many features. It makes your coffee-making experience as enjoyable as possible. Whether you are a coffee lover or simply want an efficient and easy way to make coffee, the Keurig 2.0 coffee maker is an excellent choice.

Azizul Hakim is a content creator and the co-founder of www.queekcoffee.com. He has been writing content and reviews for over five years. He loves to brew coffee and serve it with his colleagues.


